
Jan 27, 2021
Caron Cake Throw Pillow

If you're a yarn hoarder like me, you gotta have a bunch of Caron Cake in your collection. If you don't know what to do with them and you're itching to use them, here's a cool project for you.
Caron Cake yarns make a great throw pillow. The color palette of each cake will light up any room. I don't know about you, but if I make one with a Caron Cake, I have to make more. They are so much fun to work with and the colors are just delicious!
Also, the stripes pattern gives that subtle contemporary touch in your home decor. It'll give your space that nice pop of color and it accents your space effortlessly.
AND...... it's very easy to do. The only techniques you need to know is how to do single crochet and chain and how to switch yarn colors. That's it!
YARN:
Caron Cake yarns comes with a variety of palettes. I used the regular Caron Cake (Rainbow Sprinkles) and Caron Big Cakes (Cake Pop and Blue Macaroon). I used one skein for each pillow.
For the back side, you can do the same pattern but what I did is do a plain solid color. It gave that nice modern touch. Just pick one that is close enough to any of the stripe colors.

Red Heart Super Saver
Aruba Sea
Caron One Pound
Soft Grey
Caron One Pound
Blue Danube
Caron Cake
Rainbow Sprinkles
Caron Big Cake
Blue Macaroon
Caron Big Cake
Cake Pop
CROCHET HOOK: H/8 - 5.0mm
OTHER MATERIALS:
- darning needle (to weave ends)
- scissors
- 16" x 16" pillow insert
FINAL MEASUREMENT:
14" x 14"
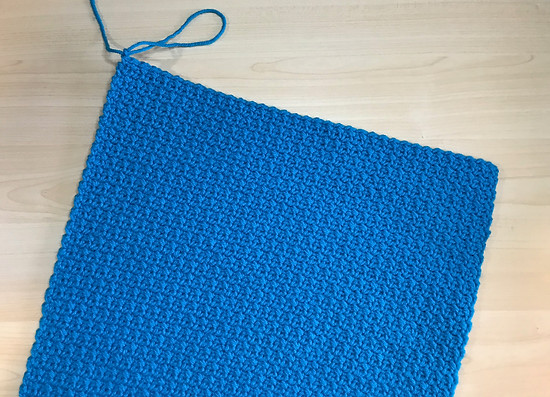
I actually found out about this stitch by accident. I was doing the Moss Stitch but instead of doing the alternate process of the Moss Stitch, I crocheted the sc stitch over the sc stitch of the previous row instead of the chain. Then I noticed the cool texture so I just keep on going. And I ended up liking it. I researched for the stitch name (because there's got to be one... there is no way that I'm the first one to do this). And I saw Daisy Farm Crafts website and they have a video for it and they called it "Mesh Crochet Stitch". So there it is!

Here's a YouTube video. Check it out and subscribe. More patterns are coming!
When working with Caron Cakes, I like starting my projects through the center of the skein. It just flows so smoothly while working.

Start with a 70-chain foundation or a chain foundation with multiples of any even number.

SC in the 2nd chain from the hook.

Do a chain and skip the next stitch.


SC in the next stitch.

Keep repeating this process.

SC in the first stitch (sc from the previous row).
Do a chain, skip the next stitch (chain 1 from the previous row) then sc in the next stitch.

You should finish the row with a SC stitch, then do a chain and turn.
We're crocheting the same stitch over each other. SC on the SC from the previous row and chain while skipping on the chain from the previous row.
Here's a tip --- do the SC stitch on the V.


You can keep going if you like and go with the flow with the Caron Cake color switch but I like my stripes to be nice and even. So I am stopping after 10 row. (so each stripes are 10 rows)
Grab the rest of the yarn color and find the cut off. Set aside the yarn. Don't throw it away, we'll need that for our tassles.
Here's how to switch yarn colors:

On the very last SC stitch, pause when you have 2 loops on your hook.

Grab the other yarn color.

Yarn over through the 2 loops.

Do a chain and turn. Leave the ends. Don't crochet over them.

Start doing the Mesh Stitch...
SC on the first stitch, chain, skip and SC on the next stitch.


I finished up with 6 rows of stripes so I can end up with a perfect square size (14" x 14"). Now we need to weave in the ends with a darning needle.
For the back panel, you can pretty much choose any of the stripe colors and it will look cool. That's what's great about this. I was debating between black and turquoise blue. But since I only have one stripe of the turquoise blue so I went for that. The closest I have is the Caron One Pound Blue Danube.


I did the same count for the back panel. Starting with 70 chain foundation. To finish it, just line it up with the from panel and make sure that it's the exact size.
This is actually pretty fast to make. I thought it'll be boring but I ended up finishing this panel after watching 3 episodes of "The Mandalorian" at Disney+.


Line your panel, right side facing each other.
Start from one of the sides, start doing a slip stitch.
Once you are done with the 3 sides, cut off a long strip of yarn.


Turn it inside out.
Put in your pillow insert.
With your darning needle, sew it in with a Mattress Stitch - insert the darning needle into the innermost loop from the bottom to top. It's just like a shoe lace method.
I thought it'll be fun to add some tassles. You don't have to but if you do, here's a quick tutorial.

Grab the leftover yarns

Find something to wrap the yarn. I like using my small notebook. Perfect size for the tassle. Cut a small strip of yarn at least 8" long and aligned it with your board or notebook.

Start wrapping the yarn around it. The number of rounds depends on how think you want your tassle to be.

With the 8" strip, tie it on around the wrapped yarn.


Pull out the wrapped yarn out.
Cut the edges.
Wrapped the top part of the tassle to create the "neck" part.
With your darning needle, insert the yarn through the top to secure it.
To finish up, trim the edges. Make 4 tassles with 4 different colors from the Caron Cake yarn.
Attach it to the 4 corners of the pillow with a darning needle.

I hope you're able to follow this pattern easily. It's a very easy project. Feel free to contact me if you have any question or any issues with this pattern.
Thank you so much!


Happy Crocheting!
